How to Save Site As Template in SharePoint 2010?
Sometimes you need to create multiple sites that would have same contents or atleast all of the sites have some common web parts, libraries, lists and contents. So instead of creating every site from the scratch, you can create site template then create sites based on that template. This approach would save time and make sure you have consistency across the board.
If you go to Site Actions then Site Settings, you don't find the Save Site As Template option. Atleast I didn't find it anywhere.
If you dont find the option of Save Site As Template, then go to the URL as shown below in the image. type http://yoursite/_layouts/savetmpl.aspx. Enter the complete URL of the site you want to create a template of then append /_layouts/savetmpl.aspx to it. The .aspx page will be opened as shown below.
1) Type the Filename and Template name. Tick the box 'Include Content' if you want to have content included from the source site.

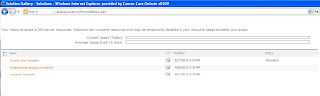
2) You can see your site template name in the Solution Gallery.
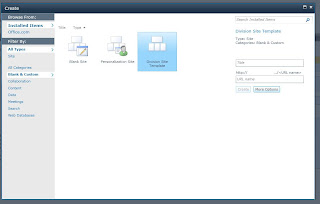
3) Since the site template has been created, you go to Site Actions --> New Site
Click on Blank & Custom section on the left navigation. On the main section you will find your site template that you created in previous step. Select the site template then click Create.
You site will be created successfully.
Thanks!
Enjoy :-)
Sometimes you need to create multiple sites that would have same contents or atleast all of the sites have some common web parts, libraries, lists and contents. So instead of creating every site from the scratch, you can create site template then create sites based on that template. This approach would save time and make sure you have consistency across the board.
If you go to Site Actions then Site Settings, you don't find the Save Site As Template option. Atleast I didn't find it anywhere.
If you dont find the option of Save Site As Template, then go to the URL as shown below in the image. type http://yoursite/_layouts/savetmpl.aspx. Enter the complete URL of the site you want to create a template of then append /_layouts/savetmpl.aspx to it. The .aspx page will be opened as shown below.
1) Type the Filename and Template name. Tick the box 'Include Content' if you want to have content included from the source site.

2) You can see your site template name in the Solution Gallery.

3) Since the site template has been created, you go to Site Actions --> New Site
Click on Blank & Custom section on the left navigation. On the main section you will find your site template that you created in previous step. Select the site template then click Create.
You site will be created successfully.

Thanks!
Enjoy :-)